The safety pin: an incredibly versatile tool. I am sure to have at least one on hand at all times. I once offered a safety pin to a female friend and colleague. Her blouse had lost the top button, causing brief brassiere exposures during our morning meeting. I was sure she did not want that throughout the entire day. Well, she informed me she was not in need of the fix, as a fix was not needed. Here blouse was in fact intact. This was her intended style. That was the last day I offered anybody a safety pin. Now, I wait for the request.
Here are my Top 5 Safety Pin Fixes
1. Take in a skirt– A No-Sew Waistline Alteration: Be sure to pin the fabric on the inside to conceal it. I often create two smaller pleats, one on each side, rather than just one pin in the back.
2. Perk Up Turtleneck Droop: Tight fitting at the neckline turtlenecks are a must for me. Unfortunately, most of mine droop. The fix? I use a safety pin in the back on the inside, doubling the excess fabric and pinning it in the back to create a more finished look in the front. I wear turtlenecks often, so I am very comfortable doing this. I would recommend beginners to get the safety pin into place with the garment off. Turn your garment inside out. Make a pleat and center it in the back of the neckline. Then, carefully pin it up. Viola! It may take a couple of tries to get it just the way you want it.
3. Shape Up the Shapeless Jacket: This tip is for thin jackets or sweaters. I have often gotten a light jacket or sweater that I really like the front of, but the back is a snoozer. My ideal jacket or sweater pulls in at the waist in the back; it gives it some shape and interest. If its not there, I make my own! All you need is a safety pin and a button. This sometimes takes a few tries to get it straight and just right. The button needed is the kind that has a solid face and a “sleeve” in the back, not the traditional button with two or four holes through the front. Gather a neat centered pleat (how many folds in the pleat is determined by how far in you want the garment to go in the waist and the thickness of your material). Pin half of the pleat, then put the pin through the button, and then pin through the rest of the material. Try on your jacket and check you look in the mirror Repeat as needed until you have it the way you like.
4. Cure Button-Gap: I rarely wear button-down shirts because of a condition I call “button-gap”. This condition often develops when I sit down. All these gaps between the buttons magically appear, much to my dismay. Safety pin to the rescue again. This works best on shirts constructed with the extra strip of fabric behind the button holes and the buttons, as this allows you to pin the material in a way that is completely invisible when the garment is worn. Start by buttoning up your shirt, and then take it off while it is buttoned. Turn it inside out. Now carefully pin the spaces between the buttons on the inside. Watch what you are doing carefully. You want the pin to go directly from one piece of fabric to the next with no space. This minimizes puckering. This technique takes me a few tries to get it straight with no puckering. And there you have the cure for button-gap.
5. Jewelry Quick Fix: Use a safety pin to fix a broken necklace. I have a few necklaces relegated to the back bottom drawer of my jewelry box because of broken clasps. Use the safety pin to connect the two ends of the necklace. This works well for me because my jewelry collection is all costume jewelry. Also, I often wear jackets over my tops, thus covering the pin in the back.
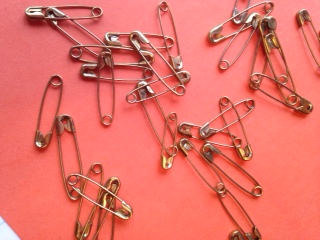
These suggestions above work best with the larger safety pins. I always have at least one safety pin available at all times. They have so many different uses. I am a safety pin fan; they sure help me keep it together!! I hope they can help you keep it together, too!


