Author Archives: robin swetz

Unknown's avatar

About robin swetz

I am a creative writer that enjoys the simple things in life. I really connect with humor and really like making observations and writing about them with an overlay of humor. Its what makes my world go around.,

Thanks Note Cards

This is a quick note card to make.

Write ” thanks” in cursive across an unlined 5 x 8 index card folded in half. ( I practiced writing this in cursive a bunch of times to get it to look just right). I began and ended the word at the very edge of the card to give it some extra flair.

Then, I colored the spaces in with colored pencils. Freshly sharpened colored pencils look best for crispness.

I have given these to individuals for thank you notes and people share liking them. Also, I make them in denominations of 6 to a package and include 6 invitation envelopes as part of a gift bag/basket.

Get Inspired !

I invite you to get inspired.  Recently, I have been on a kick to share some of my favorite inspirational quotes with colleagues,  friends, and family. I have a list of about 60 inspirational quotes with their author’s included with each quote. I cut them up into slips of paper that I either roll up or fold up and use them to fill up either glass jars or miniature Chinese takeout boxes (the  party favor kind).  I had either colored ribbon or pieces of chocolate in with the jar or box.  They have been well received and people find that the quote speaks right to them, myself included!

Also, for Thanksgiving and Christmas at my home, as part of doing up the table for our holiday meal, I include an inspirational quote at each place setting.  We each read our quote aloud.  It is interesting to hear all the different quotes.  Even my kids get into the meaning of each quote.  Great stuff!!!

I gathered the quotes mostly by googling inspirational quote websites and reading through all of them to find the ones that speak most to me.  Also, if I hear them along the way,  I write them down on the back page of my planner at work or in the notes section of my phone.  Then, I keep up with adding any additional quotes to my master list.

Folks receiving this unique gift always seem to appreciate it, delving right into the jar or box. And , the quotes are so inspiring to me, I have written one on each week of planner throughout 2017! I’m looking forward to each new message each week!!  Wishes for getting inspired to everyone!!

Rubber Boots Repurposed

I have always found rubber boots to be charming.  They remind me of rainy days spent playing in my aunt’s backyard, where she had huge and overflowing  wild flower gardens.  I actually don’t remember if I wore rubber boots when we were stomping around in the garden.  But, my aunt’s flower garden on a rainy day is what I think of when I see rubber boots.  So, I have been known to buy a pair or two of rubber boots that catch my eye.  And, other uses for them have popped into my head.  We use them on the top of the refrigerator to hold pens and scissors.
I also use them to store some of my paint supplies on a shelf at the top of my basement.  

I put together this little summer scene in front of my home.  I found some artificial flowers at the dollar store and arranged them in the boots.  The chair was less than 5 dollars at Goodwill.  I gathered the watering can and mini wheel barrow somewhere along the way. I put some rocks in the bottom of the boots to keep the wind from tipping the boot bouquet over. 

I also have a few boots at my office displaying paint brush boquets. 


I find rubber boots to be sweet and charming. I never know what boots I might run into and what they could be used for.  So, happily, I continue my boot quest. 

 🙂  Robin

Cute Note Cards

These are easy to make.  I used off white unlined note cards folded in half with matching envelopes.  I found fun stick on flowers to adhere to the card.  Then, with a black sharpie, I wrote the word “flowers” in cursive, with a bit of a dramatic wisp. These feel really summery and fun to me. 

Make Your Own Dry-Erase Board

IMG_5652     IMG_5654

Make Your Own Dry-Erase Board

Supplies Needed:

Picture Frame with Glass

Unique paper

Making It

This one is quick and easy, and is a charming way to display brief yet important messages.

When choosing my frame, I wanted one with a thick width.  I imagine a thinner frame might look nice too.

When choosing my paper, I wanted to have a lighter color with a unique design on the background to add some interest and flair. The lighter color allows the marker to be seen more clearly.

Next, I simply cut the paper to size using the glass in the frame to measure the size of the paper needed. Put the paper in the frame as though you were putting a picture in. I added a few sheets of white computer paper cut to size to keep the glass from shifting. The extra pieces of paper put behind the colored paper seems to make it sturdier, particularly because you are writing on it and erasing it, certainly using it more than you would if it was just a picture on a shelf.

I imagine you can change the paper out, as well, if a unique paper catches your eye.

This is an easy one to try out. Make it your own.

Mini-Playing Card Ornament

Mini-Playing Card Ornament

This is a unique ornament idea that uses miniature playing cards. I believe I found this pack of miniature playing cars at Goodwill, but I imagine a dollar store may sell them.

Supplies Needed :

Miniature playing cards

card photo1

String

Double-sided tape

Step1 Fold cards with the “playing side” faced in.

card photo 2

Step 2 Tape back side of cards together. I do this systematically. I found odd numbers work best, 3, or 5 worked best.

Step 3 Just before taping last cards together to form a continuous grouping, insert string tied with large loop on the top to serve as the “hook” to hang the ornament. I tried two different ways for the bottom-one long and dangling, and one ending inside of the structure. Be sure that the string is connected to the tape to better secure it and prevent the ornament from slipping off of it.

card photo 3

Three Quick Fixes

The other day, I ripped open a bag of rice. Now, usually I would move the contents into an airtight container. But, this had the instructions and several quick dish ideas on the bag. So, I could not just get rid of the bag. Then, it came to me. Painters tape. Painters tape holds well, but also allows me to remove it easily. I use a nice big piece, and secure the top of the bag by folding it several times. I’ve gone in and out of it a few times since, and it’s still holding up.

painters tape               rice bag

Next, I see one of my cabinet drawers has opened on it’s own again. It rolls open only about 3 inches, enough to create a problem if you’re walking by. It looks to have lost its balance on the rollers. So, I can either dismantle the entire thing, or find a less taxing and less time-consuming solution. Velcro it is. I get a set of complementary pieces, stick one of each where they can touch each other, (one on the back of the face of the drawer, and the other on the front of the frame of the cabinet). Viola! No more mysterious opening cabinet drawer.

kitchen drawer open

kitchen drawer velcro 2                                         kichen drawer velcro 1

Recently, I found the most gorgeous green colander, with a unique shape and color. I don’t need anymore colanders. But, this was almost a work of art, really. I left it on my counter for several days, trying to figure out how to display it. One day, for convenience, I put a bunch of hand wash dishes in it to dry. This worked out really well, because it freed up my precious counter-space from having all types of dishes,cups, and flatware out to dry on the kitchen towel. The items dried fairly quickly within the colander. And, this unique colander is out for viewing.

green colander

My Scarf Issue

I have a problem. For some women, it’s shoes. For me, it’s scarves. I just love scarves; long ones, short ones, plump ones, thin ones, monochromatic ones, colorful ones, ones with fringe, ones without, ones with beads, textured ones, smooth ones.

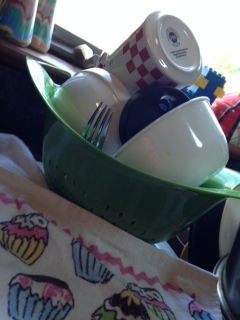
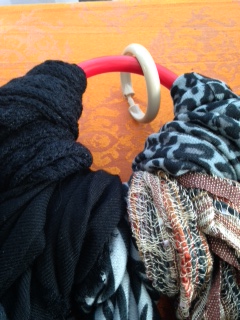
My scarf collection has grown tremendously over the past few years, and this big massive scarf collection had taken over. They were in an unusable tangled ball on the back of my master bathroom door, similar to the knotty mess that extension cords get into.  At first, the system seemed to work. I used shower rings, interlocking them to form long chains. I then pulled each scarf through each shower ring. I hung the scarf chains on over the door hooks behind the bathroom door.

scarf hook before pic photo

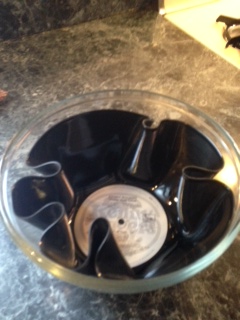
Dismantled Previous Scarf Organizing System

It was a space efficient way to store my scarf collection; bathroom door open, collection disappears. But, a problem developed. As the collection grew, my storage process failed. The clump grew into a massive mixed up mess. It was so big now, that my bathroom door could only open partway. I do admit, I began adding other things to this collection, such as nightgowns, bathing suits, and bathrobes. By the end, nothing was usable, including getting in and out of the bathroom easily.

Necessity is the mother of invention. And so began my quest to fix this mess.

So, the time had come to revamp the entire system.

I came up with a simple solution:

* Store only scarves in this area. (Seems simple, but took some work)

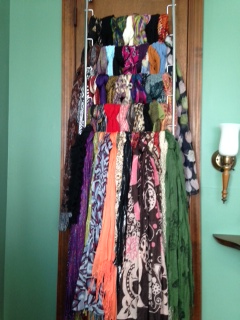
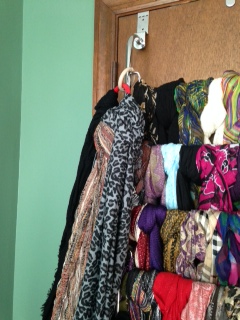
* Use an over the door blanket holder with 5 rods. ( I always check to see that the door can close properly with the over the door style storage solutions.)  I can put  eight to ten scarves in each row. This system works well. It allows me to see all of my scarves, their colors, their weight, and size both width and length.

scarffinishedproject.photo                            cropped scarf pic photo                                cropped scarf pic 2 photo

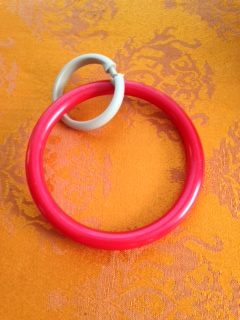
* Use a larger ring to put infinity scarves on, and affix this to the blanket holder with a shower curtain ring, just one ring though.

infinity empty scarf hook 2 pic photo                                 full infinity scarf hook photo                          finished prodc w infinity scarf hook photo

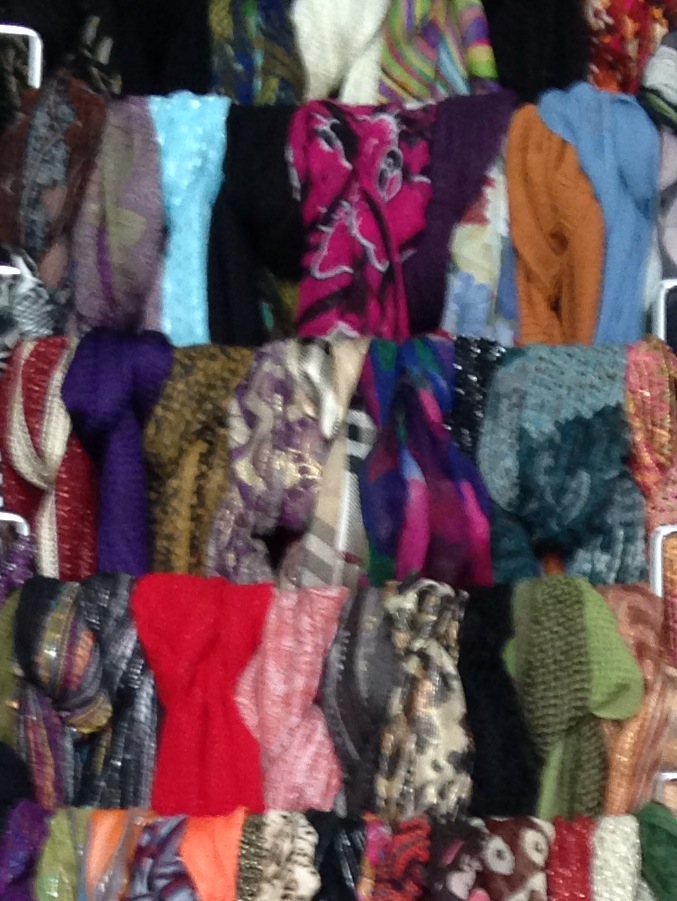
I wish I had taken a before picture, as the after is so much more organized, usable, and actually quite beautiful with all of the colors and textures on display. But, I admit I was too embarrassed to capture the before: my mess, in such a visible and formal way.

Since my scarf collection revamp and reorganize, I have been using more of my scarves, not just the one or two that I would wear prior to this. It’s nice not having a big tangled mess to have to deal with.

You scarf collectors/hoarders, don’t scarf at this idea until you give it a try!  Happy organizing!

scarffinishedproject.photo

Over-the-door Scarf Organizing System Finished Product

Record Bowl

recordbowl1photo   reocrd.pan.photo   recordowl2photo   reocrd.pan.photo   recordbowl3photo

It’s just what it sounds like; you make a record into a bowl. Younger folks may not know what a record is.  A record is a vinyl disc that when played on a record player creates the sound of music. The needle of the record player some how translates the grooves in the vinyl into sound, and sends it through speakers.  Viola, music! I still think it’s magical.

So, this is a very cool idea.  And, it is beyond easy.  Let’s get started.

Materials Needed:

•  33 Records: I got mine at the local Goodwill for 99 cents each. The ideal records for this project are not too thick and not brittle. You can decipher this simply by touching them. I have actually run across a few records so old and decrepit that they practically broke when I was touching them.

ovenhandle.photo              timer.photo              reocrd.pan.photo               glassbowlphoto

•  Oven set to 200 degrees

•  Timer set to 5 minutes

•  (Pizza pan optional– the record never gets so hot that it drips, but I am a “better to be safe than sorry” kind of girl!)

•  A glass bowl used to shape the record while it is in the very warm and malleable phase, just out of the oven.  I used a 2.5-quart mixing bowl.  But, there is no need to be so precise.  Any bowl with a wide enough opening will work well.

 Process:

Step 1-    Set oven to 200 degrees. I imagine much warmer may in fact melt the record, not just soften it. And, not warm enough and you cannot shape and mold the record.

Step 2-   Put the record in the oven for 5 minutes. I use a timer, as I am prone to wander off and start a new project or task. Timers always call me back and keep me focused.

 Step 3-   Be sure to have the glass bowl you are using to assist you in shaping the very warm record ready and available.  Once the record comes out of the oven, you have a limited time to mold it before it begins hardening, maybe about 20 seconds at most.  Take the record out of the oven. It is very warm, but not hot, so you can pick it up directly with your hands.  Place it over the glass bowl, and push it down in the center, where the paper and hole is.  Be sure to press it all the way flat to ensure the bowl will rest flat when done. If you do not like how it turned out, you can return it to the oven for another five minutes and give it another try.

fifthtolastrecordbowlphoto  forthtolastphoto  thirdtolastphoto  secondtolast recordbowlphoto  recordinbowlphoto

Step 4-   Enjoy.  These record bowls intrigue people. I give them as gift baskets. I line them with decorative tissue paper, and add anything from fanciful chocolates to packages of my hand-made note cards.  People, at least people in my cohort and older, notice fairly quickly that this is a record shaped into a bowl.  Then, they are amazed to hear that I made them.  Give it a try!  It is so easy.

samplerecordbowl2photo

Utensil Bouquet

utensilboquette.photo


We have all seen the utensil bouquet. Sometimes they are one color, simple, and sparse, other times they are colorful and bountiful.  Whether you like “matchy –match” sets or go wild and crazy outside the lines, a utensil bouquet adds a creative country kitchen accent and flare to your countertop. Also, it is quite convenient to have your cooking and serving utensils at your fingertips.

Gone is the day of the container marked “Utensils”.  Now, you make it your own.

 Getting Started

There are many containers you can use to hold your cooking and serving utensils. It is just a matter of considering what you see for that purpose, thinking outside the lines.

  • For example, in my home we have a heavy-duty wrought iron kettle. It’s spiral handle adds charm. 
  • It’s sturdy weight allows it to stand firmly, even as I wildly ransack it, with one eye on the soon to boil over pan on the stove.
  • I put a trivet under it to keep it from scratching the counter.

Tips to Remember

  • Heavy sturdy weight
  • The right height. The utensils need to be able to stand in it without tipping out, but also be out enough to see and grab easily.
  • The right size opening; To small of an opening makes it difficult to access your utensils, while too big of an opening allows the utensils to splay out too much, causing them to tip out, not to mention looking a bit messy.
  • Colors- I am a fan of the monochromatic utensil ‘vase”, holding a cornucopia of utensils, different colors and styles. I like the look of the unexpected and the variety.
  • My rule of thumb is polychromatic or patterned container goes with monochromatic utensils, and vice versa.

Most of my treasures are found at local consignment shops and Goodwill, so the variety is great, and the prices are great, too.  I have created a great utensil bouquet in a charming vase. I hope you have fun with your treasure hunt!