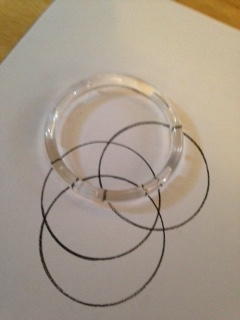
These cards are made by drawing overlapping circles and coloring in the shapes made by the overlapping circles.
Step one: use an 8 x 11 sheet of cardboard stock white paper. I have found that regular white paper is a little bit too thin.
Step two: Find the tool that you will use to make the circles with. I actually use a clear plastic ring, the kind that they sell scarves on. It is 3 inches in diameter. It isn’t too thick or too thin, allowing me to hold it sturdily while I trace the circle on the inside. I imagine some of the plastic and wood and bracelets that I have much like this would work well, too. It is also important to make sure that the inside where the pencil will follow along is smooth so that the circle made is clean and crisp. 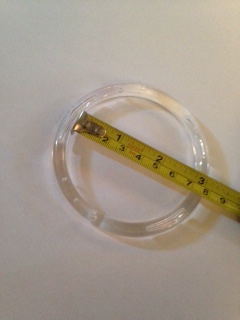
Step three: I use a black colored pencil and press firmly and steadily to make a crisp black circle. Then, I repeat this, overlapping the circles over the entire page.
Step four: Continuing with the colored pencils, choose four or five colors that will look good together. Then, fill in some of the unique spaces that were created by the overlapping circles. I myself leave a few blank here and there for effect.
Step five: Next, I cut out small squares of what I have just colored in, much like taking a zoomed in snapshot of a bigger picture. I don’t measure each one per se, just go by what looks best. In measuring one after the fact, it measured one and on half inches x one and one third inches. Some of them I cut smaller, and more square.
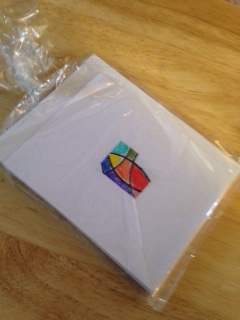
Step six: Using double-sided tape, adhere the square to the center of an 8 by 5 plain index card folded in half. My orientation is interestingly enough always the long way, horizontal. Also, when folding your index card, be sure that all of the edges match up straight before you put a firm crease in it.
Optional: I pencil in on the back of the card a quick description of my method and medium.
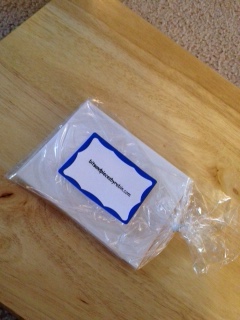
Also, I package these in quantities of six, both cards and invitation size envelopes. Be sure to face one of the finished cards out to properly display it. Clear favor bags with ties, size 10 by 5, work really well to package the card set. The twist tie also allows the package of cards to be opened and re-closed easily. Also, using a blank label sticker, I put a little something on the back of the package. This might be a good place to write a quick message or just a simple To and From.